Generate Yearbook Forms
Jump to navigation
Jump to search
Overview of NA225
The initial step in soliciting congregational information is to generate congregational report forms for distribution to churches. This procedure facilitates the production of report forms requesting updated congregational data in categories such as address information, membership/attendance, receipts, and outreach.
- From the DDI Connect main menu, double-click Yearbook System
- Double-click Operations
- Double-click 225 Generate Yearbook Forms. The parameters screen will launch:

The following fields are available on this screen:
| Field | Description |
|---|---|
| Yearbook year | Enter the yearbook year for which you are generating the forms |
| Due date | Enter the date that you require all congregations to have their completed forms submitted back to you by. You can type the date in mm/dd/yyyy format or click the calendar icon to select the date |
| Print selection | Select the option you wish to use for printing. You can opt to generate all yearbook forms, just unprinted forms, or for a specific region |
| Region | This field is only available if you select "Print specific region" above. Type the region code or click the list icon to select from a list of active yearbook region codes in the system |
| Form | Type the merge form code or click the list icon to select from a list of active merge forms in the system |
Print Options
After clicking the Print Options button you will see the following options. Choose the desired options and click OK to return to the report parameters screen.

| Option | Description |
|---|---|
| Printer | Click the drop down arrow to select from a list of available printers. DDI Connect uses your default printer unless told otherwise |
| Format | Click the drop down arrow to select from a list of available formats. Select paper size, number of columns, and number of rows for printing. Each report has built-in format defaults. Select “Use Defaults” to use the built-in report defaults. The number of rows and columns controls the print size and amount of information per page |
| Memo | If you wish, you can add a memo to the output of the report. NOTE: It is recommended that Word documents be saved with the .docx extension |
| View Report | This option generates a pdf file that is displayed on the screen when the report is generated |
| Archive Report | If this option is selected, the system will archive the report in the DDI Connect report archives. For information on working with archived reports, please reference this page: Archived Report Viewer |
| Print Report | If selected, the system will generate the report output to your default printer. NOTE: You will also receive a pdf version of the report, displayed on your screen |
| Print via PDF | Prints directly to your printer. |
| This option allows you to send a .pdf attachment of the report to the indicated users' email addresses. When OK is clicked, a dialog box will open requesting a recipient | |
| Duplex/Top | Prints the report on both sides of the paper in landscape style. The printer must be capable of printing on both sides or an error will occur |
| Duplex/Side | Prints the report on both sides of the paper in portrait style. The printer must be capable of printing on both sides or an error will occur |
| Green bar | Adds shaded, horizontal bars to the report, making it easier to read across columns |
| No dialog | Selecting this option means that no ‘Report Completed’ dialog will display after the report has been generated |
| Extra copies | If you want extra copies of the report generated, type the number in this field |
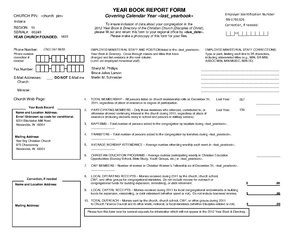
Click Start. The system will generate the forms for eventual printing. You will have to merge the documents in order to actually print out the forms. Click below to view a sample yearbook form.