Difference between revisions of "Withdrawal Notices"
| Line 99: | Line 99: | ||
[[Category:Investments Reports]] | [[Category:Investments Reports]] | ||
[[Category:Mail Merge Reports]] | [[Category:Mail Merge Reports]] | ||
| + | [[Category:Dynamic Merge Form Selection]] | ||
Revision as of 17:22, 11 July 2016
Overview of IL354
The Withdrawal Notices report creates investment withdrawal receipts for a date range that you specify. The report output displays the summary of transactions, count of those transaction types, debits and credits. To run this report:
- From the DDI Connect main menu, double-click Financial Services
- Double-click Investments
- Double-click Reports
- Double-click 354 Withdrawal Notices. The parameters screen will launch:

The following fields are available on this screen:
| Field | Description | ||||||||
|---|---|---|---|---|---|---|---|---|---|
| Start date | Enter the beginning date of the range you wish to generate notices for. You can type it in mm/dd/yyyy format or click the calendar icon to select the date | ||||||||
| End date | Enter the ending date of the range you wish to generate notices for. You can type it in mm/dd/yyyy format or click the calendar icon to select the date | ||||||||
| Category | If you wish to generate notices for a particular investment category, you can do so here. Type the code or click the list icon to select from a list of active investment categories. Leave the field blank to run for all investment categories | ||||||||
| Generate statements | If selected, the Merge Method field will enable. Click the list icon to select the method desired to create the notices. Your options are:
If not selected, the report will run in Report Only mode |
Mailmerge Fields
This report generates mailmerge data (max 50) and has the potential to include the following fields.
| Name | Description |
|---|---|
| reg-id | |
| inv-num | |
| tran-dt | |
| start-bal | |
| tran-total | |
| interest-rate | |
| end-bal | |
| reg-addr1 | |
| reg-addr2 | |
| reg-addr3 | |
| reg-addr4 | |
| reg-addr5 | |
| reg-addr6 | |
| reg-addr7 | |
| reg-addr8 | |
| type-descr | |
| term-descr | |
| conf-note-descr | |
| conf-type | |
| bottom-title | |
| bottom-message | |
| blank-field |
Print Options
After clicking the Print Options button you will see the following options. Choose the desired options and click OK to return to the report parameters screen.

| Option | Description |
|---|---|
| Printer | Click the drop down arrow to select from a list of available printers. DDI Connect uses your default printer unless told otherwise |
| Format | Click the drop down arrow to select from a list of available formats. Select paper size, number of columns, and number of rows for printing. Each report has built-in format defaults. Select “Use Defaults” to use the built-in report defaults. The number of rows and columns controls the print size and amount of information per page |
| Memo | If you wish, you can add a memo to the output of the report. NOTE: It is recommended that Word documents be saved with the .docx extension |
| View Report | This option generates a pdf file that is displayed on the screen when the report is generated |
| Archive Report | If this option is selected, the system will archive the report in the DDI Connect report archives. For information on working with archived reports, please reference this page: Archived Report Viewer |
| Print Report | If selected, the system will generate the report output to your default printer. NOTE: You will also receive a pdf version of the report, displayed on your screen |
| Print via PDF | Prints directly to your printer. |
| This option allows you to send a .pdf attachment of the report to the indicated users' email addresses. When OK is clicked, a dialog box will open requesting a recipient | |
| Duplex/Top | Prints the report on both sides of the paper in landscape style. The printer must be capable of printing on both sides or an error will occur |
| Duplex/Side | Prints the report on both sides of the paper in portrait style. The printer must be capable of printing on both sides or an error will occur |
| Green bar | Adds shaded, horizontal bars to the report, making it easier to read across columns |
| No dialog | Selecting this option means that no ‘Report Completed’ dialog will display after the report has been generated |
| Extra copies | If you want extra copies of the report generated, type the number in this field |
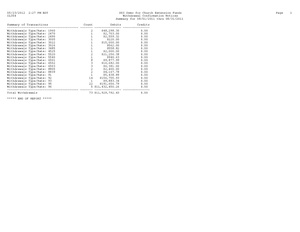
Click Start. The system will generate the report based on the parameters you selected, and display the results. Click below to view a sample of this report.
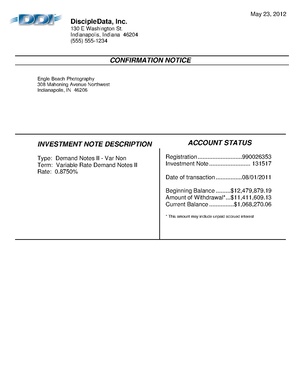
If you elected to create notices, you will now need to merge the documents. Click below to view a sample Withdrawal Notice.
Security Function
Users must pass the security function listed below in order to run this report.
INVOPER