Investment Daily Checklist
Contents
- 1 Overview
- 2 Renewals
- 3 Renewals with Partial Redemption
- 4 Full Redemptions by Check
- 5 Full Redemptions by EFT
- 6 Partial Redemptions by Check
- 7 Partial Redemptions by EFT
- 8 In-Person Redemption with Check Printing
- 9 Additional Investment Purchase (Deposit into Demand Account)
- 10 New Investment Purchase (Brand New Constituent)
- 11 New Investment Purchase (Existing Constituent)
- 12 Adding Beneficiary
- 13 Adding a Relationship
- 14 Charge a Fee (Not an EWP): Example – Overnight Mail Fee
- 15 Merge Forms
- 16 Voiding a Check
- 17 Check Reconciliation
- 18 Deposit Receipts
- 19 Marking a Wire As Sent
- 20 Extra ACH File
- 21 Interest Rate Change
Overview
The purpose of this checklist is to walk you through daily investments processes.
Renewals
1. If this is a rollover with no changes, no action is required from you. The system will automatically handle it. If this is a renewal that has a change in terms, without a change in dollar amount prior to maturity, move to Step #2.
2. Go to Financial Services>Investments>Transactions>210 Investment Maintenance.
3. Enter the Investment Number and Click Find (or Enter on your Keyboard).
4. Update the record:
- Change In Interest Payment Method (if needed): Click Payment Tab>Update Renew pay code to what they want it to be when it renews.

- Update the Redemption Method: Click Methods Tab>chose the proper Redemption method.
Renewals with Partial Redemption
1. If this is a renewal where they want to take a partial redemption out at maturity, continue to Step #2.
2. If this is a renewal that has a change in terms, prior to maturity, move to Step #3. If there is no change in terms except for the withdraw, move to Step #6.
3. Go to Financial Services>Investments>Transactions>210 Investment Maintenance.
4. Enter the Investment Number and Click Find (or Enter on your Keyboard).
5. Update the record & Click Save:
- Change In Interest Payment Method (if needed): Click Payment Tab>Update Renew pay code to what they want it to be when it renews.
- Update the Redemption Method: Click Methods Tab>chose the proper Redemption method.
6. On the maturity day, perform a partial investment redemption (see Partial investment redemption section for directions).
Full Redemptions by Check
1. Go to Financial Services>Investments>Transactions>200 Investment Payout.
2. Enter the investment number and click Find (or enter on your keyboard)
3. Select the Interest Method = “Pay” and Payment Method = “Daily Check” then click Save.

Full Redemptions by EFT
1. Go to Financial Inquiry, search for the investment. Go to the “Settings” tab and confirm they have the ABA # & Bank Account # filled out.
- If they do not have the EFT information filled out, go to Financial Services>Investments>Transactions>210 Investment Maintenance. Find the investment, then click on the “Payments” tab and enter in the ABA #, Bank Account, and Bank Name.

2. Go to Financial Services>Investments>Transactions>200 Investment Payout. Enter the investment number and click Find (or enter on your keyboard)
3. Select the Interest Method = “Pay” and Payment Method = “EFTS Chk” then click Save.

Partial Redemptions by Check
1. Go to Financial Services>Investments>Transactions>201 Investment Payout.
2. Enter the investment number and click Find (or enter on your keyboard)
3. Select the Interest Method = “Accrue” and Payment Method = “Daily Check” then click Save.
4. Enter the Check Stub Info
5. Go to Checkwriter – Click unprinted checks:
- Either right click on the single check you want to print or print all

Partial Redemptions by EFT
1. Go to Financial Inquiry, search for the investment. Go to the “Settings” tab and confirm they have the ABA # & Bank Account # filled out.
- If they do not have the EFT information filled out, go to Financial Services>Investments>Transactions>210 Investment Maintenance. Find the investment, then click on the “Payments” tab and enter in the ABA #, Bank Account, and Bank Name.
2. Go to Financial Services>Investments>Transactions>200 Investment Payout. Enter the investment number and click Find (or enter on your keyboard)
3. Select the Interest Method = “Pay” and Payment Method = “EFTS Chk” then click Save.

In-Person Redemption with Check Printing
1. Perform a Full or Partial Redemption by Daily Check (See instructions above)
2. Print Check: Go to CheckWriter>View/Print Checks>Select your checking account & Choose “Unprinted”.
3. Find the Check>Right Click and chose Print (DO NOT CHOOSE THE PRINT BUTTON AT THE TOP, THIS WILL PRINT ALL CHECKS)
Additional Investment Purchase (Deposit into Demand Account)
1. Go to Financial Services>Data Processing>Payment Processing. Find your batch and then double on the check at the bottom of the screen:

2. Choose Investment Transactions>Investment Purchase.

3. Enter the Investment # and Click Find (or press Enter).
4. Click Save.

New Investment Purchase (Brand New Constituent)
1. Go to Financial Services>Data Processing>Payment Processing. Find your batch and then double on the check at the bottom of the screen.
2. Choose Investment Transactions>Investment Purchase.
3. Select “Create New Investment” Button ![]()
4. Select the “Create New Account” Button

5. Select “New Constituent”

6. Enter in the Constituent Information then click Save. Then click “Select”.

7. Choose Ownership Format and click Save

8. Choose the Investment Type on the “Settings tab”. Then choose the interest payment method on the “Payments” tab.


9. Click Save in the Investment Purchase.

New Investment Purchase (Existing Constituent)
1. Go to Financial Services>Data Processing>Payment Processing. Find your batch and then double on the check at the bottom of the screen:
2. Choose Investment Transactions>Investment Purchase.
3. Select “Create New Investment” Button ![]()
4. Enter or search for the account number. Then click find.
5. Choose the Investment Type on the “Settings tab”. Then choose the interest payment method on the “Payments” tab. Then Click Save.
6. Then click Save in the Investment Purchase.
Adding Beneficiary
1. Go to Name/Address System>Name/Address Inquiry. Search for the account record that you need to add a beneficiary on.
2. Once in the record, click the “Account” button.
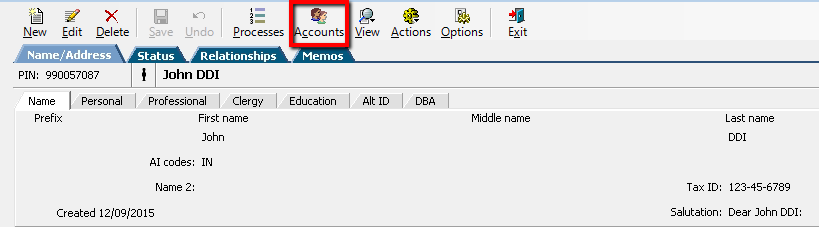

3. Then choose the account and click “View”

4. Then add a new constituent.

5. If it is an existing constituent then search for it or if it is New, click “New Constituent”.

6. Then select a relationship if applicable.

7. Then right-click on the beneficiary and then “Toggle Beneficiary”.


Adding a Relationship
1. Go to Name/Address System>Name/Address Inquiry. Search for the account record that you need to add a relationship on.
2. Add the relationship:
- New: Click “New” then select the relationship type and enter the “New Constituent”.
- Existing: Click the Actions Button>New Relationship. Find the PIN and choose the relationship type and then click OK.
Charge a Fee (Not an EWP): Example – Overnight Mail Fee
1. Go to Financial Services>Investments>Transactions>206 Financial Adjustment.
2. Find the Inv #.
3. Then Enter in a –amount into the Principal Balance field. Example: -10.00. Then Click Save.

4. Then Email accountant to debit Suspense GL and credit the correct GL.
Merge Forms
1. Go to the Merge Forms System Merge Print Requests. Select the forms you want to merge then click Merge. From there it will pull up a PDF of those forms, review, print, and mail to your constituents.

Note: For your quarter end statements, they will be located under the “Nested Mailmerge” menu.
Voiding a Check
1. Go to Check Writer>View/Print Checks. Select the printed radial button.

2. Find the check that you need to void, and then right click on the check and click void.

Check Reconciliation
1. To reconcile checks, go to Checkwriter>CW08 Check Reconciliation>Select your checking account

2. If you want to do a set range enter then>then press “View Checks”
3. Go to Checkwriter>Reports>CW10 or CW32
4. Select your date range>Run the report


5. Go to Fundwriter>Reports>FW37
6. Select the GL (checking account) and select date range

Deposit Receipts
1. Go to Financial Services>Investments>Reports>IL248

2. Make sure the generate receipts box is check and click start
3. Go to the Merge Form System>Merge Print Requests
4. Make sure to check the print all button and print

Marking a Wire As Sent
This process is assuming you have already sent the wire through the bank.
1. Enter the withdrawal/advance into DDI as an ACH.
2. Go to CheckWriter>Wire Inquiry / Status Change
3. Find the wire that was sent and click on the sent button

NOTE: This will make ensure that the payment will not go out in the daily ACH file
Extra ACH File
1. Go to Checkwriter>Reports>CW33 Generate EFT File
2. Define the Path/File Name

3. Press Start
4. Upload the file to the bank
Interest Rate Change
1. Go to Financial Services>Setup>Type and Rate Maintenance
2. Find the type that needs the updated rate and edit the rate
3. Press Save

NOTE: If IL250 is setup in the ME process no further action is needed.
4. To update the rate immediately manually go to Financial Services>Reports>IL250

5. Select the type to be updated and select the Update investments