Difference between revisions of "Adding an Investment"
Jump to navigation
Jump to search
| Line 28: | Line 28: | ||
* Enter the account number for the investor. You can opt to type in the account number or click the search icon to the right of the field to locate the account. You can also add a new account from this screen by clicking the New Account icon. For information on how to add a new account to the system, please reference this page: [[Account Entry]]. When you have entered or found the account, press enter to continue. | * Enter the account number for the investor. You can opt to type in the account number or click the search icon to the right of the field to locate the account. You can also add a new account from this screen by clicking the New Account icon. For information on how to add a new account to the system, please reference this page: [[Account Entry]]. When you have entered or found the account, press enter to continue. | ||
| − | + | ==Settings Tab== | |
| Line 62: | Line 62: | ||
| − | + | ==Payments Tab== | |
Revision as of 11:12, 2 April 2012
Adding a New Investment to the DDI Connect System(IL210)
There are certain situations in which you will need to add a new investment without purchasing one using the Cash Processing procedure. For example, if you have an investor whose investment is maturing and they want to reinvest, you would add a new investment and use the transfer and payout screen.
NOTE: This screen should NOT be used to purchase a new investment. New investment purchases should be processed via the Investment Purchase process. For information on how to perform that procedure, please reference this page: Purchasing an Investment
To add a new investment:
- From the DDI Connect main menu, double-click Financial Services
- Double-click Investments
- Double-click Transactions
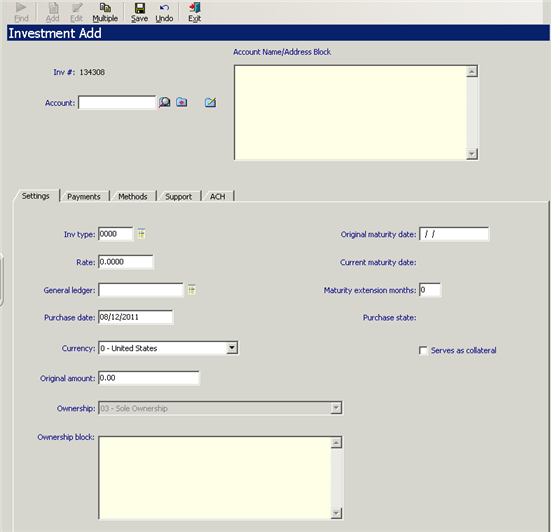
- Double-click Investment Add. You will see this screen:

- The system will automatically assign the next available investment number
- Enter the account number for the investor. You can opt to type in the account number or click the search icon to the right of the field to locate the account. You can also add a new account from this screen by clicking the New Account icon. For information on how to add a new account to the system, please reference this page: Account Entry. When you have entered or found the account, press enter to continue.
Settings Tab
Add information to the following fields:
| Field | Description |
|---|---|
| Inv Type | If you know the investment type number, you can type it in this field. Otherwise, click the list icon to the right of the field to select from a list of active investment types in the system. If you need to add a new investment type, please reference this page: Investment Type and Rate Maintenance |
| Original maturity date | This field will automatically populate, based on the type of investment you select. You should not change this date |
| Rate | This field will automatically populate based on the type of investment you select |
| General ledger | This field will automatically populate based on the type of investment you selected. You can override this selection by either typing the new GL number or clicking the list icon to the right of the field and selecting from a list of active GL numbers in the system |
| Maturity extension months | This field will automatically populate, based on the type of investment you selected |
| Purchase date | The system will automatically populate this field with the business date. If you opt to change it, review the original maturity date to ensure that it is correct |
| Currency | If your organization accepts other types of currency, you can click the drop down list to select from a list of currencies set up in the system. For information on how to add additional currency types, please reference this page: Currency Setup. This field defaults to 0 - United States |
| Serves as collateral | If this investment serves as collateral for a loan, check this box |
| Original amount | Enter the amount of the investment |
Review the information on the screen. If it appears to be correct, you can click the Payments tab to continue: